

Can’t decide between peanut butter cookies and brownies? Congratulations, your indecisiveness has led you to cookie nirvana!
These Peanut Butter Brownie Swirl Cookies are what happens when you refuse to choose between life’s greatest pleasures.
They’re the dessert equivalent of having your cake and eating it too – except better, because we’re talking about cookies and brownies here, people.
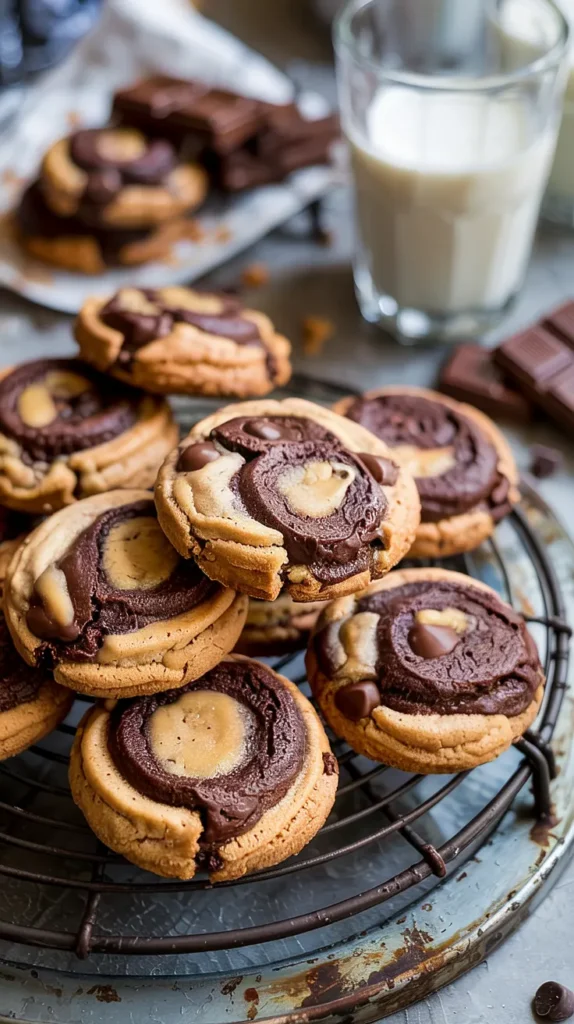
Each bite delivers a mesmerizing swirl of fudgy brownie goodness and creamy peanut butter perfection that’ll make you wonder why you ever settled for one-flavor cookies in the first place.
Why This Recipe is Awesome

Let’s get real – these aren’t your average cookies. They’re basically two desserts in one, which means you can tell yourself you’re showing restraint by eating “just one cookie” when you’re actually inhaling both a brownie AND a peanut butter cookie. That’s what I call smart snacking.
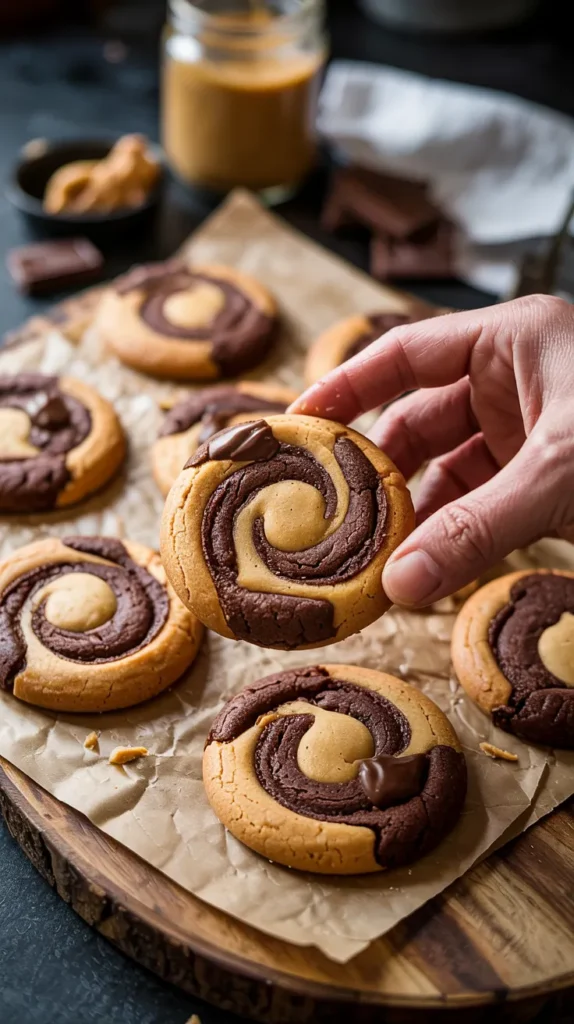
The gorgeous swirl pattern makes these cookies look like they came from a fancy bakery, but they’re surprisingly doable even if your artistic skills max out at stick figures.
Each cookie has its own unique marble design, making them basically edible art. Go ahead and post them on Instagram – I’ll wait while you collect those likes.
But the real magic is in the texture contrast. The brownie side brings that rich fudginess with pockets of melty chocolate chips, while the peanut butter side delivers creamy, nutty perfection.
Together, they create this mind-blowing cookie that’s somehow both chewy and gooey in all the right ways. It’s like the cookie gods got together and said, “Let’s blow some minds today.”
Ingredients You’ll Need
For the Peanut Butter Dough:
- ½ cup creamy peanut butter (the processed stuff works best here, save your natural PB for your morning toast)
- ¼ cup butter, softened (that’s half a stick for those who don’t speak measuring cup)
- ½ cup brown sugar (packed – don’t be shy)
- 1 egg (room temperature, please)
- 1 tsp vanilla extract (the real deal, not that imitation nonsense)
- 1 cup all-purpose flour (the backbone of all good cookies)
- ½ tsp baking soda (the science part)
- ¼ tsp salt (to make the sweet taste sweeter)
For the Brownie Dough:
- ½ cup butter, melted (another half stick, melted and happy)
- 1 cup white sugar (because brownies don’t play around)
- ⅓ cup cocoa powder (the good stuff – this is no time to skimp)
- 1 egg (again, room temperature is your friend)
- 1 tsp vanilla extract (round two of the good stuff)
- ¾ cup all-purpose flour (less flour = fudgier brownies)
- ¼ tsp baking powder (the brownie’s science experiment)
- ¼ tsp salt (balance, people, balance)
- ½ cup chocolate chips (because chocolate on chocolate is always the answer)
Step-by-Step Instructions

- First up, the peanut butter dough: Beat together your peanut butter, softened butter, and brown sugar until it’s light and fluffy – this should take about 2-3 minutes. Don’t rush this step; we’re building flavor foundations here.
- Add the egg and vanilla to your peanut butter mixture and beat until well combined. It should look smooth and slightly lighter in color.
- In a separate bowl, whisk together the flour, baking soda, and salt for the peanut butter dough. Gradually add this dry mix to your wet ingredients, mixing just until combined. Don’t overmix unless you’re aiming for tough cookies (and not the good kind).
- Set the peanut butter dough aside and move on to brownie town: Whisk together the melted butter and white sugar until smooth. This mixture won’t be as fluffy as the peanut butter one, and that’s perfectly fine.
- Beat the cocoa powder into your butter-sugar mixture until you’ve got a smooth chocolate paste. Then add the egg and vanilla, mixing until well incorporated.
- Gently fold in the flour, baking powder, salt, and chocolate chips just until no dry streaks remain. It should look like gloriously glossy brownie batter that’s slightly thicker than normal.
- Now for the patience part (sorry): Chill both doughs for about 30 minutes. This firms them up enough to handle and prevents your cookies from spreading into sad puddles in the oven.
- Preheat your oven to 350°F and line a baking sheet with parchment paper. Don’t skip the parchment unless you enjoy chiseling cookies off your pan.
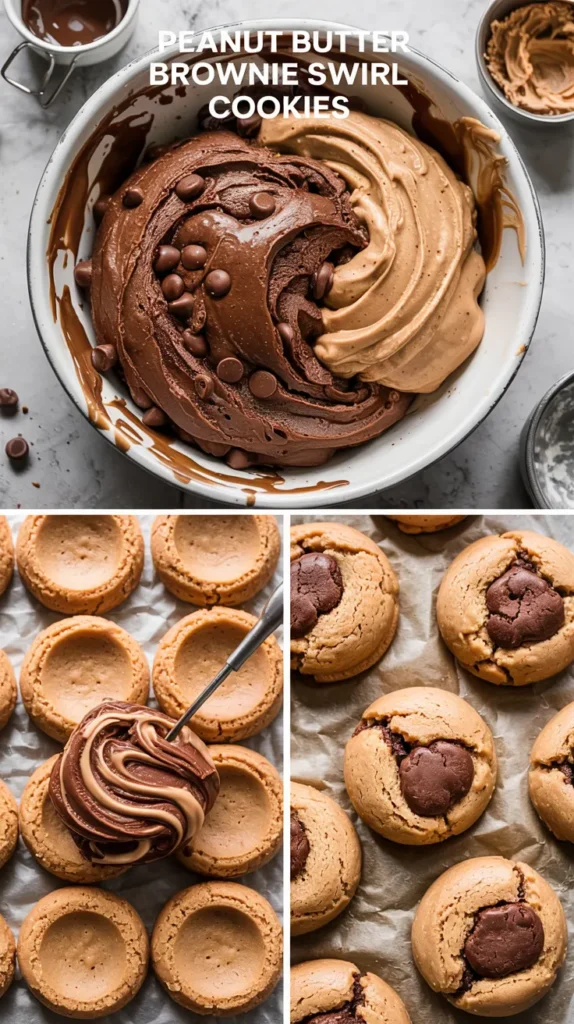
- The fun part! Scoop 1-2 tablespoon portions of each dough and place them side by side on your baking sheet, just barely touching. Think of them as dance partners about to tango.
- Using a toothpick or skewer, gently swirl the two doughs together in a marbled pattern. Don’t overthink this – a few swirls will do the trick. Overmixing will defeat the purpose of having two distinct flavors.
- Bake for 9-11 minutes, until the tops are slightly crackly and the edges are just set. The centers will still be quite soft – that’s not underbaking, that’s cookie perfection.
- Let them cool on the baking sheet for 5-10 minutes (they need time to firm up) before transferring to a wire rack to cool completely. Or, you know, eat them warm and gooey because who has that kind of patience?
Common Mistakes to Avoid
- Not chilling the dough – I know it’s tempting to skip this step, but room temperature dough = flat, sad cookies. Give them that 30-minute timeout.
- Overmixing the swirl – We’re going for a marble effect, not completely blended doughs. A few gentle swirls are all you need. Otherwise, you’ll end up with brown cookies that don’t know what they want to be.
- Overbaking – These cookies should still look slightly underdone in the center when you take them out. They’ll continue cooking on the hot baking sheet. Remember: we want fudgy, not hockey pucks.
- Using natural peanut butter – The oils in natural peanut butter can make your dough too runny and your cookies too greasy. Stick with the processed stuff for baking.
- Expecting perfect twins – Each cookie will have its own unique swirl pattern. Embrace the beautiful cookie individuality. They’re artisanal, not mass-produced!
Alternatives & Substitutions
Want to take these to the next level? Add mini Reese’s Pieces to the peanut butter dough. It’s like peanut butter inception.
For a gluten-free version, swap in your favorite 1:1 gluten-free flour blend. The texture might be slightly different, but the deliciousness will remain.
Going dairy-free? Use vegan butter in both doughs and dairy-free chocolate chips. No one will know the difference.
Need a vegan version? Use flax eggs (1 tablespoon ground flaxseed mixed with 3 tablespoons water, let sit for 5 minutes) in place of regular eggs, vegan butter, and vegan chocolate chips.
IMO, adding a sprinkle of flaky sea salt on top just before baking takes these from “wow” to “HOLY MOLY WHAT IS THIS COOKIE SORCERY?” The sweet-salty contrast is chef’s kiss.
FAQ (Frequently Asked Questions)
Can I make the dough ahead of time?
Absolutely! Both doughs can be refrigerated for up to 3 days. Just let them sit at room temperature for about 15-20 minutes before attempting to scoop and swirl.
My cookies spread too much. What went wrong?
Most likely culprit: warm dough. If your kitchen is hot or you didn’t chill the dough long enough, they’ll spread like gossip in a small town. Next time, make sure your dough is properly chilled.
Can I freeze these cookies?
You bet! Freeze them after baking and cooling completely. They’ll keep for up to 3 months. You can also freeze the dough balls (already swirled) and bake them straight from frozen – just add 2-3 minutes to the baking time.
How do I know when they’re done?
The edges should be set, and the tops should look dry with slight cracks. The centers will still look soft and slightly underdone – that’s perfect! They’ll firm up as they cool.
Can I double the recipe?
Is water wet? Of course you can double it! In fact, you probably should because these will disappear faster than you can say “chocolate-peanut-butter-swirl-deliciousness.”
My swirl doesn’t look as pretty as yours. Help!
Less is more with swirling. Just 2-3 gentle figure-eight motions with a toothpick should do it. Also, make sure both doughs are the same consistency – if one is much softer than the other, they won’t swirl as nicely.
Can I use crunchy peanut butter instead of creamy?
You rebel, you. Yes, if you like the extra texture from the nut pieces. Just know that your swirl might not be as smooth and defined.
Final Thoughts
These Peanut Butter Brownie Swirl Cookies are what happens when you refuse to compromise on dessert – and thank goodness for that!
They’re the perfect solution for the chronically indecisive, the dessert maximalists, and anyone who knows that chocolate and peanut butter belong together like Netflix and chill.
So go ahead, bake a batch and impress your friends, family, or just yourself (no judgment).
These cookies prove that sometimes not being able to make up your mind leads to the best decisions of all. And remember – calories don’t count when you’re eating artwork. That’s just science.


